Creating a new post in WordPress is a fundamental task for bloggers and website owners aiming to publish fresh content regularly. Whether you’re a beginner or an experienced user, mastering this process is essential. In this comprehensive guide, we’ll explore the step-by-step process of creating a new post in WordPress, covering everything from accessing the dashboard to optimizing your content before hitting that publish button.
Understanding WordPress Dashboard
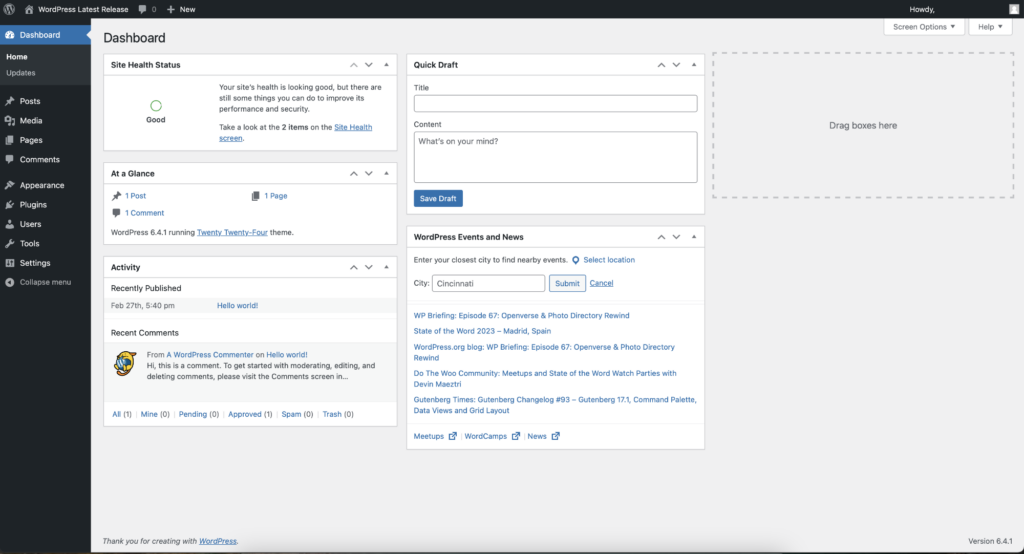
Upon logging into your WordPress account, you’ll land on the dashboard—the nerve center of your website. To create a new post, navigate to the left-hand sidebar where you’ll find the “Posts” option. Hover over it, and you’ll see the “Add New” button. Clicking on this will take you to the post editor, where the magic happens.
The WordPress Editor
The post editor in WordPress is user-friendly and offers both block-based and classic editing experiences. As of WordPress 5.0, the introduction of the Gutenberg editor revolutionized content creation by introducing blocks. Each block can contain various types of content—paragraphs, images, videos, headings, lists, quotes, and more.
Step-by-Step Guide to Creating a Post
1. Title and Content
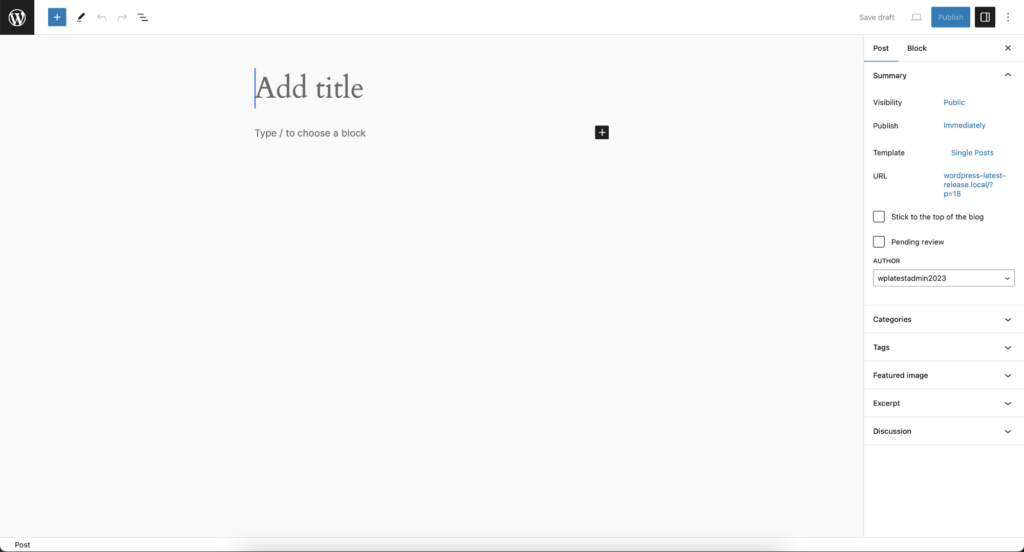
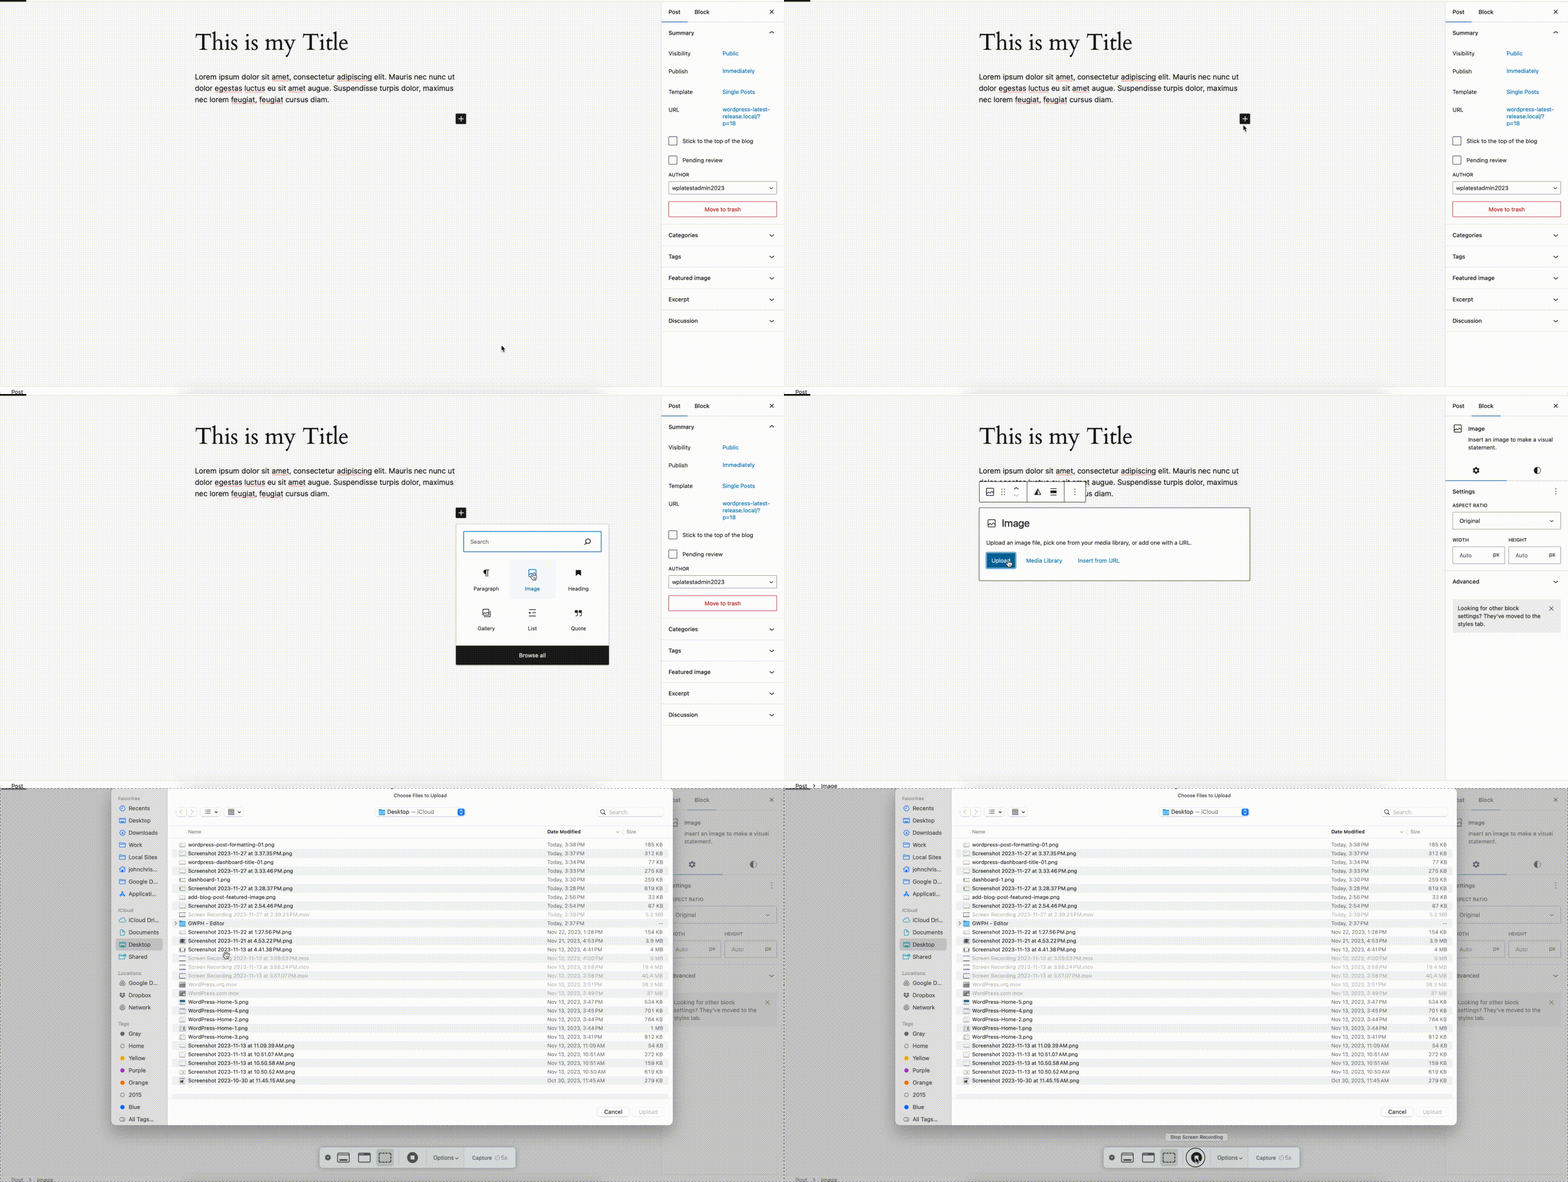
Start by adding a title to your post in the designated field at the top of the editor. Below that, you’ll find the space to craft your content. Use the blocks to structure your text and media elements. To add a new block, simply click on the “+” icon or use the slash command (“/”) and start typing the type of block you want to add.
2. Formatting Options
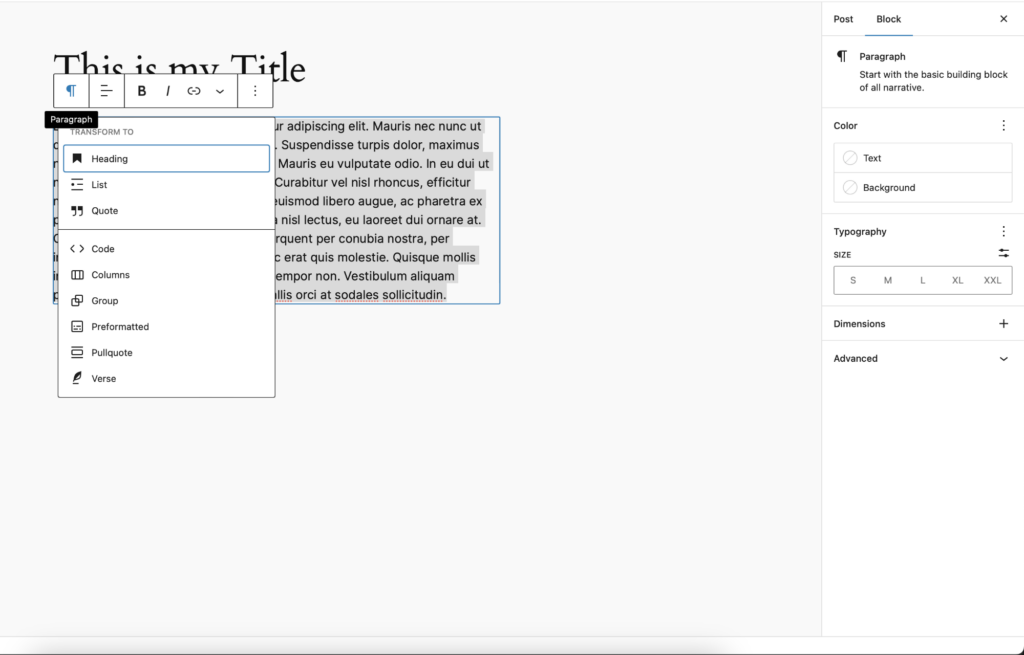
Utilize the formatting options available in the editor toolbar to style your text. You can change fonts, create lists, align content, add links, and perform basic text formatting (bold, italicize, etc.). The editor provides a live preview, enabling you to see how your post will look to visitors as you edit.
3. Adding Media
Enhance your post by incorporating multimedia elements like images, videos, and audio. Click on the “+” icon, select the “Media & Text” block, and upload your files or embed them using links. Remember to optimize images for web viewing to maintain site performance.
4. Categories and Tags
Organize your posts by assigning relevant categories and tags. Categories provide a broad grouping, while tags offer specific keywords or topics related to your content. Proper categorization helps readers navigate your site efficiently.
5. Featured Image
Choose a captivating featured image for your post. This image represents your content visually, appearing prominently on your website and in social shares. Click on “Set Featured Image” in the editor sidebar and upload/select an image from your media library.
6. SEO Optimization
Optimize your post for search engines by utilizing SEO plugins like Yoast SEO or All in One SEO Pack. These tools help optimize your content by providing suggestions for meta titles, descriptions, keyword density, and readability.
7. Preview and Publish
Before publishing, use the “Preview” button to see how your post will look on the live site. Check for any errors, typos, or formatting issues. Once satisfied, hit the “Publish” button to make your post live for your audience.
Conclusion:
Creating a new post in WordPress is a straightforward process that allows for creativity and customization. The platform’s intuitive editor, coupled with its extensive array of plugins and features, empowers users to produce engaging and visually appealing content.
Regularly publishing high-quality posts not only keeps your audience engaged but also contributes to better search engine visibility and overall website performance. By following these steps and continually refining your content creation process, you can effectively leverage WordPress to share your ideas, stories, and expertise with the world.

